
You have a lot of photos. Jobs, crew shots, before and afters. Without a system you scroll past the same pictures every time you make a post. Folders fix that.
Put your photos in folders
Step 1
Open Library in the left menu. Click the New folder button (the folder icon at the top of the list) and give it a name, like "Kitchen remodels".
Tip: if a folder is selected when you click New folder, the new one goes inside it. To make one at the top, click an empty spot in the list first.
Step 2
Click the folder to open it. Click Add Image and pick Upload. You can also pick Search Stock, Generate or Pull from website.
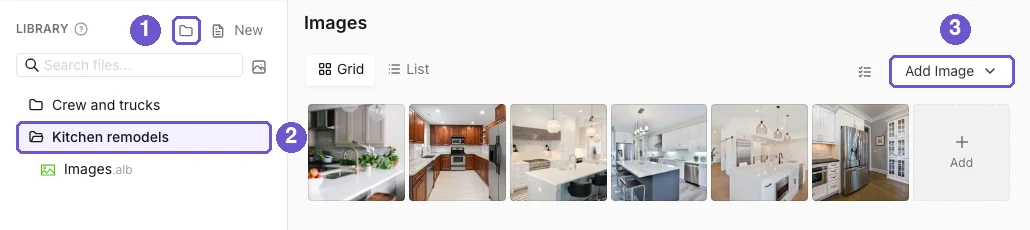
In the picture: 1 is New folder, 2 is your folder, 3 is Add Image.
Step 3
Already have photos in another folder? Click the select icon (the checklist icon next to Add Image). Then click the photos you want. A bar at the bottom shows how many you picked. Open Actions, choose Move to..., and pick the new folder.
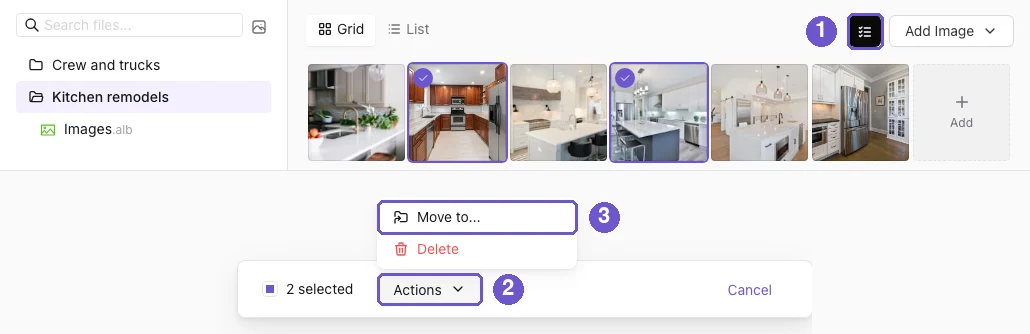
In the picture: 1 is the select icon, 2 is Actions, 3 is Move to...
Use your folders when you edit a post
Step 1
Open a post. Under its photo, click Edit, then Edit Design.
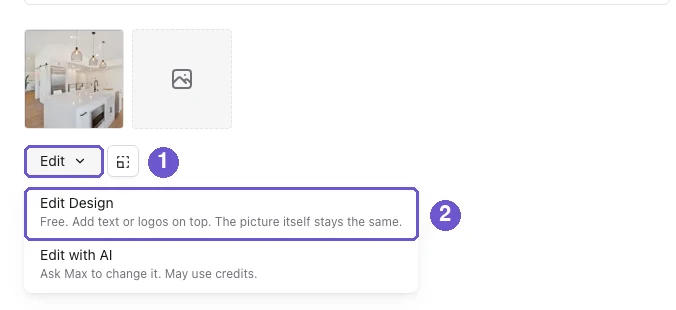
Step 2
Open the Images tab on the left. Click Library.
Step 3
Click the list icon next to the search box. You now see the same folders you made. Open one and click a photo to put it in your design. You can also type in the search box to find a photo by its name.
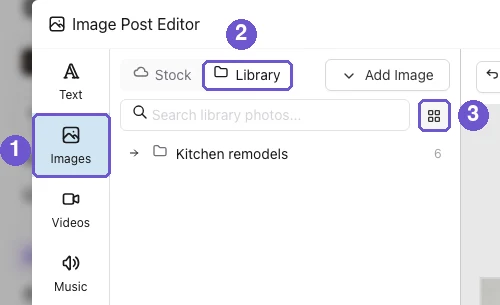
In the picture: 1 is the Images tab, 2 is Library, 3 is the folder list icon.
What you get
The right photo in a few clicks, not a long scroll. Keep one folder per job or per service, and your posts stay full of your own work.