
What is a CNAME?
Agency's have their own login portal for clients. A CNAME, or Custom Name, lets you replace the generic Marky domain of this portal (mymarky.ai) with a custom domain (e.g., social.yourdomain.com). This gives your brand a professional look and keeps your branding consistent when sharing posts and engaging with clients.
Benefits of Using a CNAME
- Professional Branding: Your own domain shows your brand to clients, adding a professional touch.
- Consistency: All posts and links come from your branded domain, reinforcing your identity.
- Enhanced Trust: Users are more likely to engage with a familiar and professional domain.
Step-by-Step Guide to Setting Up a CNAME
- Get Your Domain:
- Already have a domain? Great! You’ll use it in the next steps.
- No domain yet? You can purchase one on sites like Namecheap, GoDaddy, or other DNS providers.
- Choose a Custom Domain:
- If you already have a domain, select a subdomain like
social.yourdomain.com(or any prefix that fits your brand). - Or choose the simple domain option provided by us:
yourprefix.socialmediapostmanager.com.
- If you already have a domain, select a subdomain like
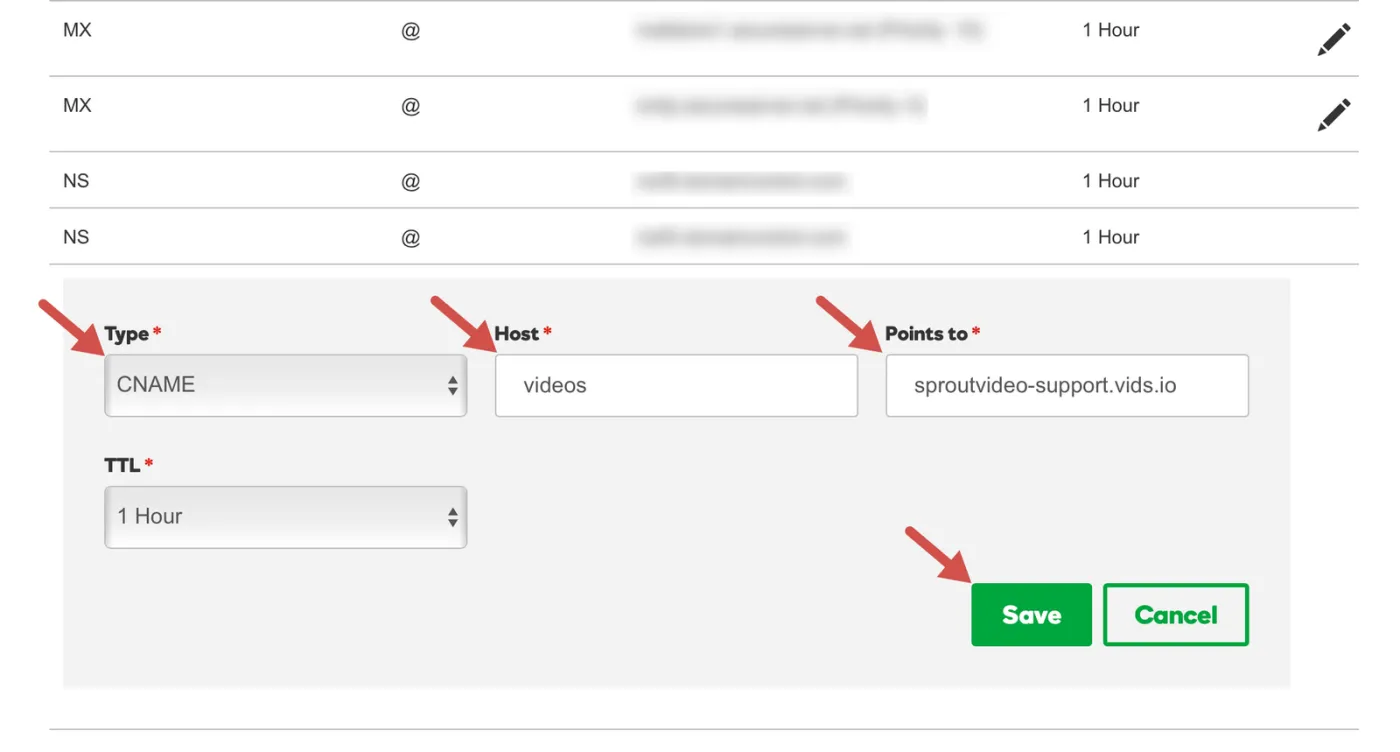
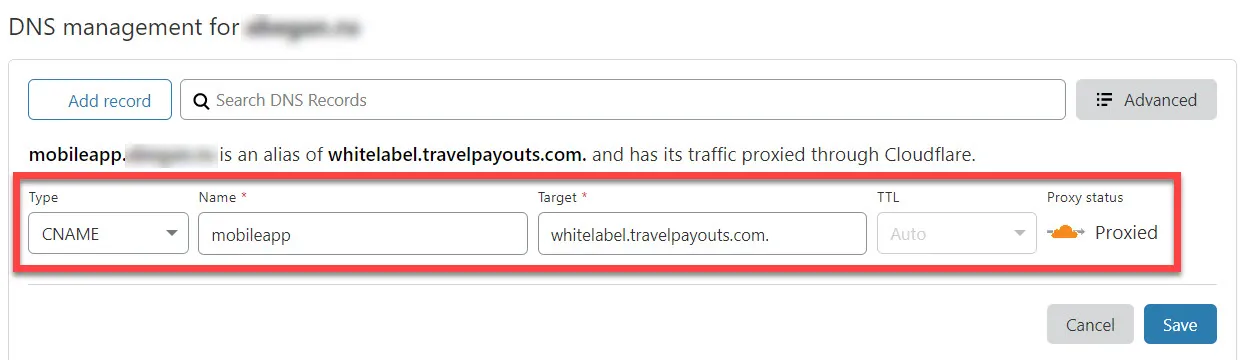
- Add a CNAME Record to Your DNS:
We must verify that you own your domain. And you must point it to redirect to Marky's servers. To do this, we will ask you to add two records to your DNS.
- Log into your DNS provider’s dashboard.
- Add a CNAME record:
- Name/Host: Enter your custom prefix (e.g., “social” if you want
social.yourdomain.com). - Type: Set this to CNAME.
- Value/Points To: Enter our Marky CNAME destination (e.g.,
custom.markyapp.com).
- Name/Host: Enter your custom prefix (e.g., “social” if you want
- Save the record and wait a few minutes for it to update.
- Verify on Marky:
- Once the status shows
Complete, you can try opening up the portal in another window. If you see the login, then the CNAME was set up successfully!
- Once the status shows